Thinking about creating infographics in the classroom lately? Introducing a short infographics course in the classroom is fun and a great learning experience at the same time for students and teachers alike!
If you’re a teacher looking to introduce infographic creation in the classroom, learn how to use Easelly with your students with these treasure trove of resources!
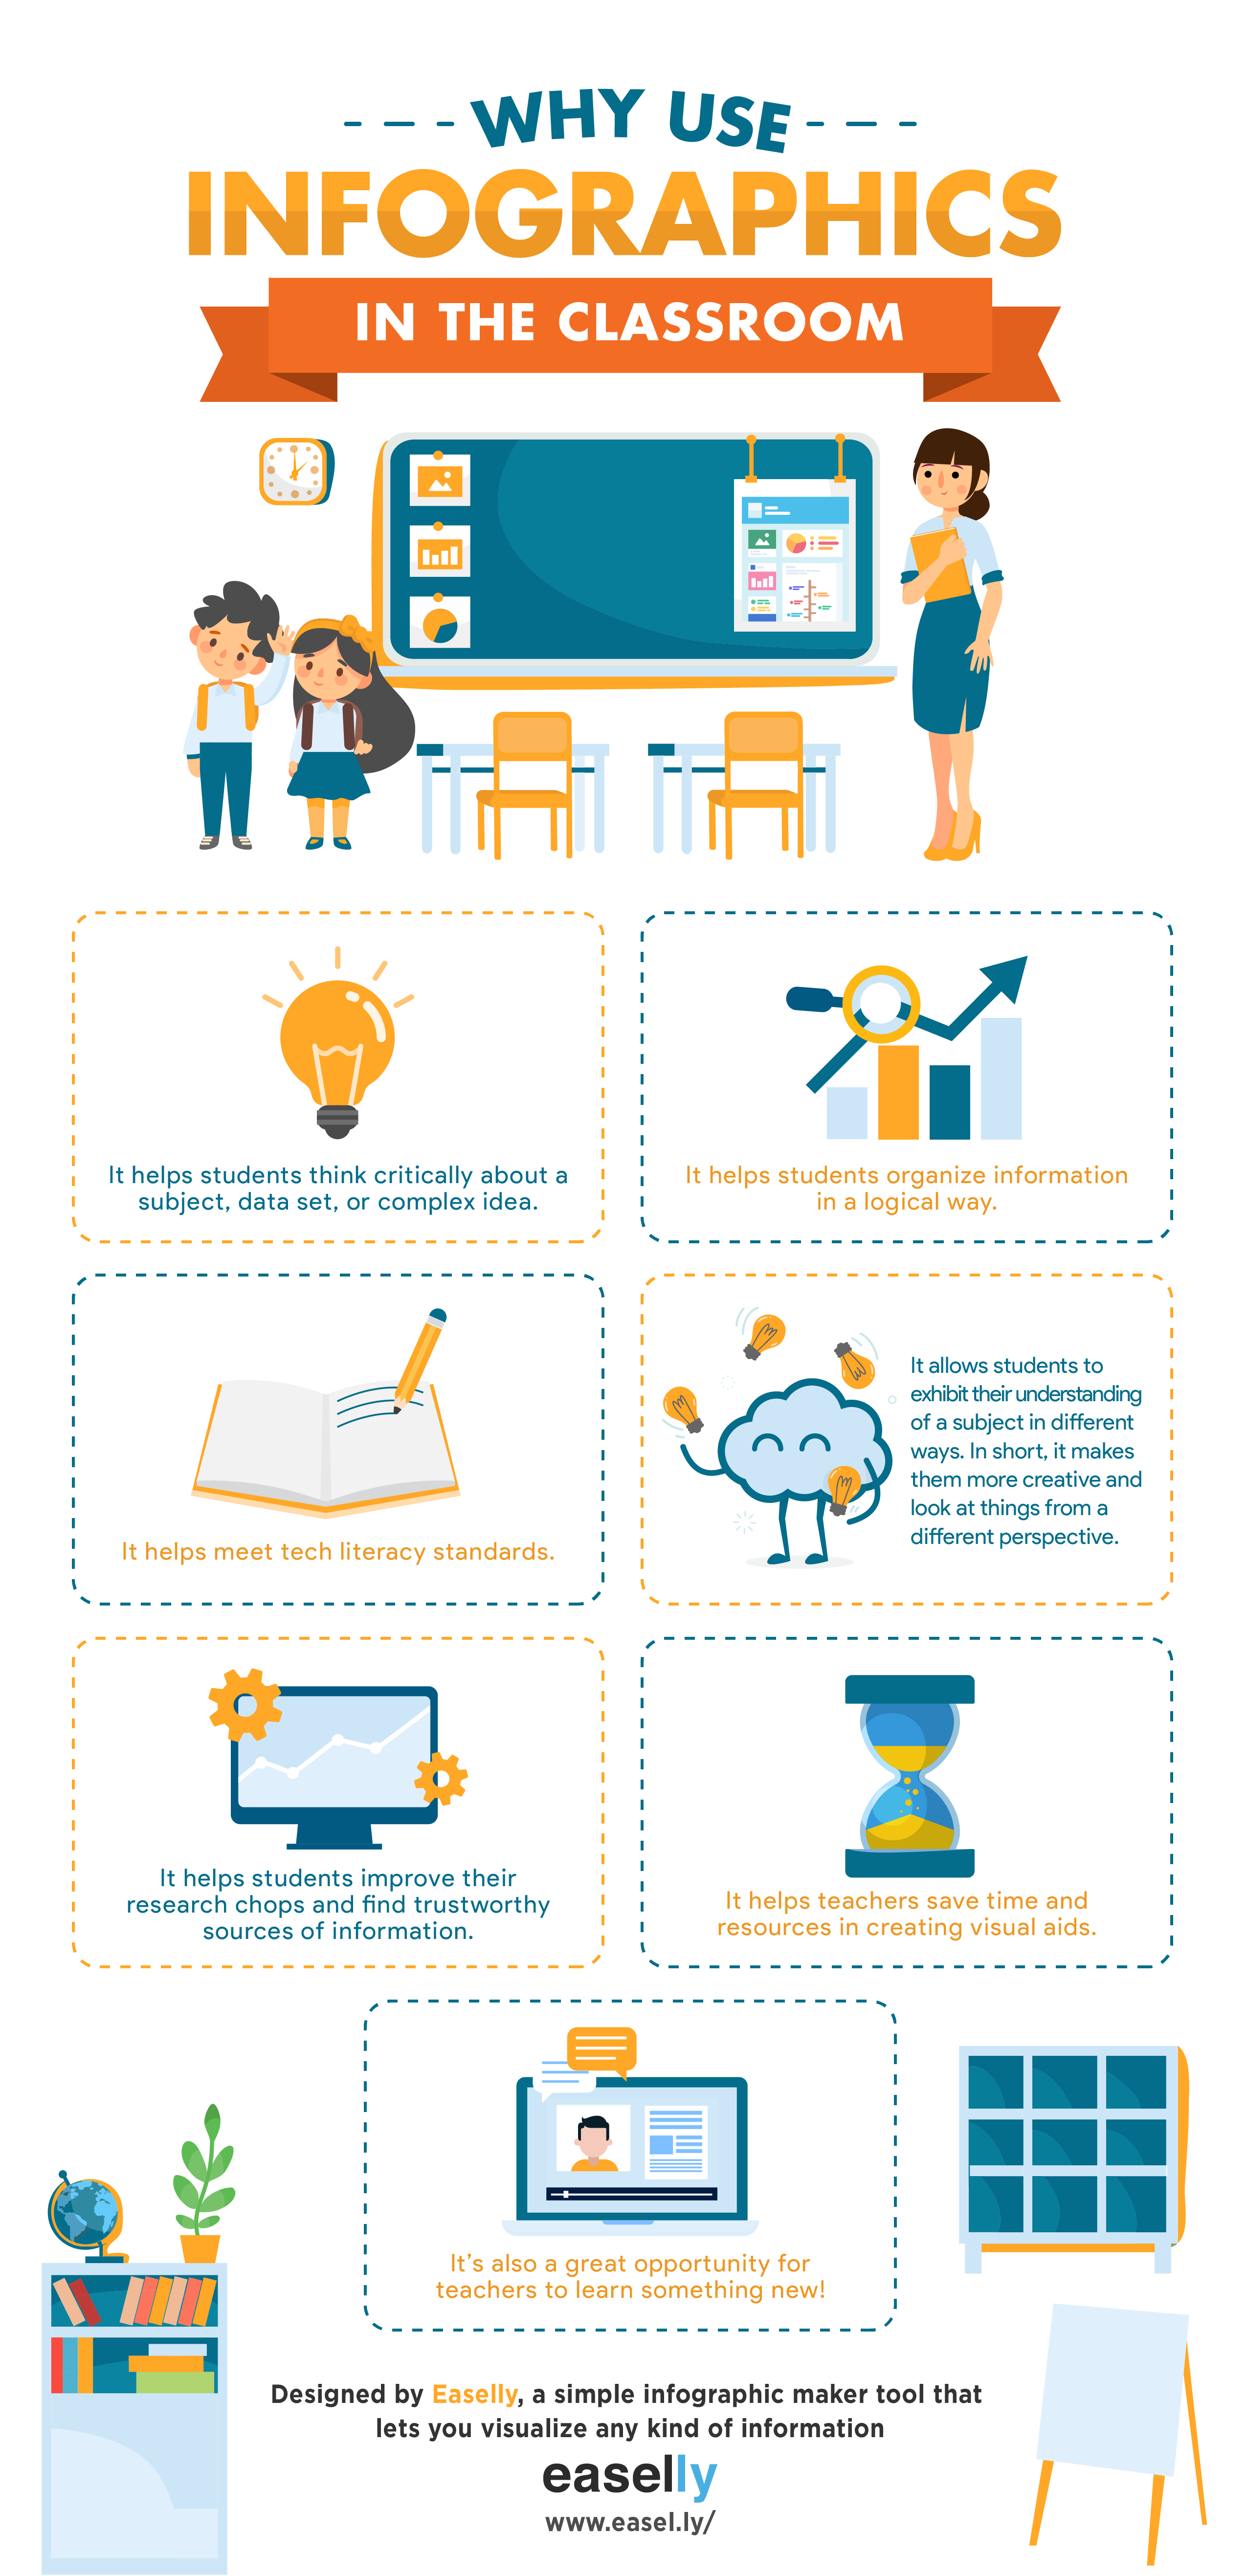
Benefits of infographics in the classroom
Our tool is simple and intuitive, which makes it easy for students to learn it quickly.
To get set up with Easelly in your classroom, you’ll need a few things:
- A classroom infographic creation account for up to 30 students
- A Group (if you want to manage student work and privacy settings)
- Computers with access to the internet
Our support team can help you set up accounts for students that don’t require personal emails, so make sure to contact us before starting a project with your class!
Once you’ve set up your classroom account and a Group with your students (optional), you’re ready to start talking about infographics in the classroom.
The basics of infographics
The best way to get kids interested in Easelly is to start by explaining what infographics are and why they’re being used. We’ve created a few resources for your class, including:
- The History of Infographics [VIDEO]
- Infographics for Your Class [E-BOOK]
- 10 Types of Infographics and When to Use Them (GUIDE)
Hopefully, these resources will give your students a taste of what infographics are and how they can use them for your next infographic lesson plan.
Once they know the basics, it’s time to introduce them to Easelly!
Introduction to Easelly
Depending on the age, grade, and technical skills of your class, you can take a few approaches in using Easelly with your class for the first time. You can:
- Watch our webinar How to Make Infographics With Students so you can teach the tool one-on-one
- Demonstrate how to use Easelly using a projector or video you’ve created
- Watch Creating Your First Easelly Infographic while students have their browsers or iPad apps open
- Let students play with the tool on their own (encourage them to ask questions!)
- Make sure students know how to Save, Share and Download their infographics, as well!
Planning infographics
Once the students know how to use Easelly to some degree, it’s time to give them their assignments! Of course, students need time to research their topic and gather information, but once they’ve collected everything they need, it’s time to plan out their infographic.
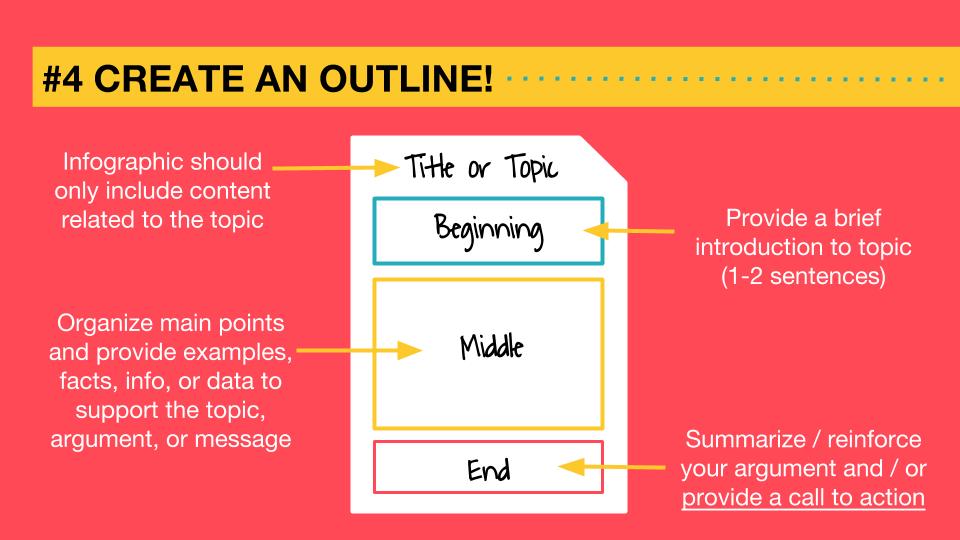
We recommend using a rough infographic outline (see image above) before creating the final image so students know:
- Where their text will go
- If they have enough information (or too much)
- The flow of their design, which will help them pick a template
To help them with their rough draft, students can also watch Why You Need a Rough Draft Before Creating Infographics:
You can make rough draft completion part of your rubric, or as just an exercise to get students familiar with the concepts involved in infographic design.
Once they’ve got their outline, it’s time to get to work on the final product.
Start creating infographics!
This is the fun part – when you get to see students’ creativity in action. Since most students will be new to Easelly, it’s more important to focus on how they’re sharing information rather than the perfect design (students aren’t going to be graphic designers on their first try!).
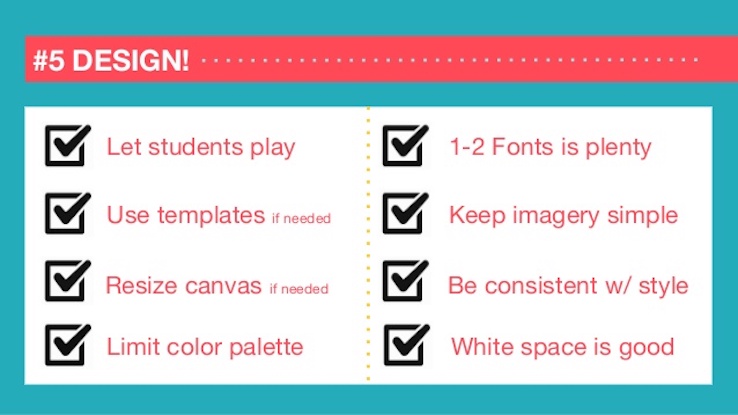
Aside from our basic design tips (above), we have a ton of resources on creating infographics, including ways to make the images look their absolute best. Your students can check out:
- The Importance of Font [VIDEO]
- The Complete Infographic Checklist [VIDEO]
- How to Choose Colors for your Infographic [VIDEO]
And if you’re looking for more information on introducing Easelly into the classroom, check out these gems straight from fellow educators:
- Make Data Literacy Fun + Activity
- Students and Teachers Using Easelly
- Effective Teaching: 5 Ways to Use Infographics
- Using Easelly for Motivation, Engagement & Assessment
- A 20-Year Teacher on Educating with Infographics
Questions about Easelly?
If you’re looking for resources to help with Easelly or your student accounts, check out our:
- Show, Don’t Tell blog
- Udemy: FREE Crash Course in Infographics with Easel.ly
- Free Infographic Activity Book for Students
- Easelly’s Student Privacy Pledge
- Infographic design tips and tutorials on YouTube
Say hello at support@easel.ly to get started with your teacher or classroom Pro Account – and to get your students set up in Easelly Groups!
—
Done creating infographics with your students? Share it with us on Facebook (easel.ly) and Twitter (@easel_ly)! We can’t wait to see!